

Cryptohopper is one of the most popular trading bots used by cryptocurrency traders to automate their trading strategies. As an experienced Cryptohopper user, I often get asked by beginners how to properly setup and configure a Cryptohopper trading bot from scratch.
In this complete setup guide, I will walk you through the entire process step-by-step. Whether you’re completely new to algorithmic trading or looking to switch from another platform, this tutorial will help you get up and running with a customized Cryptohopper trading bot.
Introduction to Cryptohopper
Cryptohopper is a cloud-based crypto trading bot platform designed to trade automatically on your behalf using trading strategies and indicators. With Cryptohopper, you can set up your trading rules and let the bot handle the orders and execution 24/7.
Why Use Cryptohopper for Trading?
Here are some of the key benefits of using Cryptohopper:
- Automated trading – The bots trade automatically based on your configured strategy, even while you sleep. This saves you time from manually placing trades.
- Backtesting – You can backtest your trading strategies against historical market data to fine-tune them.
- Technical indicators – Utilize indicators like RSI, MACD, Bollinger Bands etc. to identify trading opportunities.
- Trailing stops – Use trailing stops to maximize profits and minimize losses.
- Portfolio management – Manage your crypto portfolio across multiple exchanges from one interface.
- Paper trading – Test your strategies in a simulated trading environment before risking real capital.
Prerequisites for Setting up a Trading Bot
Before you can set up your Cryptohopper trading bot, there are a few requirements and steps you need to complete beforehand:
Create a Cryptohopper Account
First, you’ll need to go to www.cryptohopper.com and sign up for a new account. The signup process is quick and only requires your name, email address, and password creation.
Once your account is created, you can immediately log in to the dashboard.
Select a Subscription Plan
Cryptohopper offers three main subscription plans for accessing their platform – Explorer Hopper, Adventure Hopper, and Hero Hopper.
The Explorer plan is free and lets you connect 2 exchanges with up to 15 active trading pairs. This is a good option for testing the platform.
The Adventure Hopper plan costs $19/month and gives you access to 5 exchanges with 50 active trading pairs and basic technical indicators. This is suitable for beginners.
The Hero Hopper plan at $99/month is the most comprehensive, allowing you to connect 10 exchanges with 500 trading pairs and use all platform features. I recommend this for serious traders.
Select a plan that meets your requirements as you’ll be prompted to pick one when setting up your hopper.
Setting up a Trading Bot
Once you’ve signed up and selected a subscription plan, it’s time to configure and set up your trading bot. Here’s how to do it step-by-step:
Access the “My Bots” Section
Login to your Cryptohopper account and navigate to the left sidebar menu. Click on “My Bots” to open the bot management page.
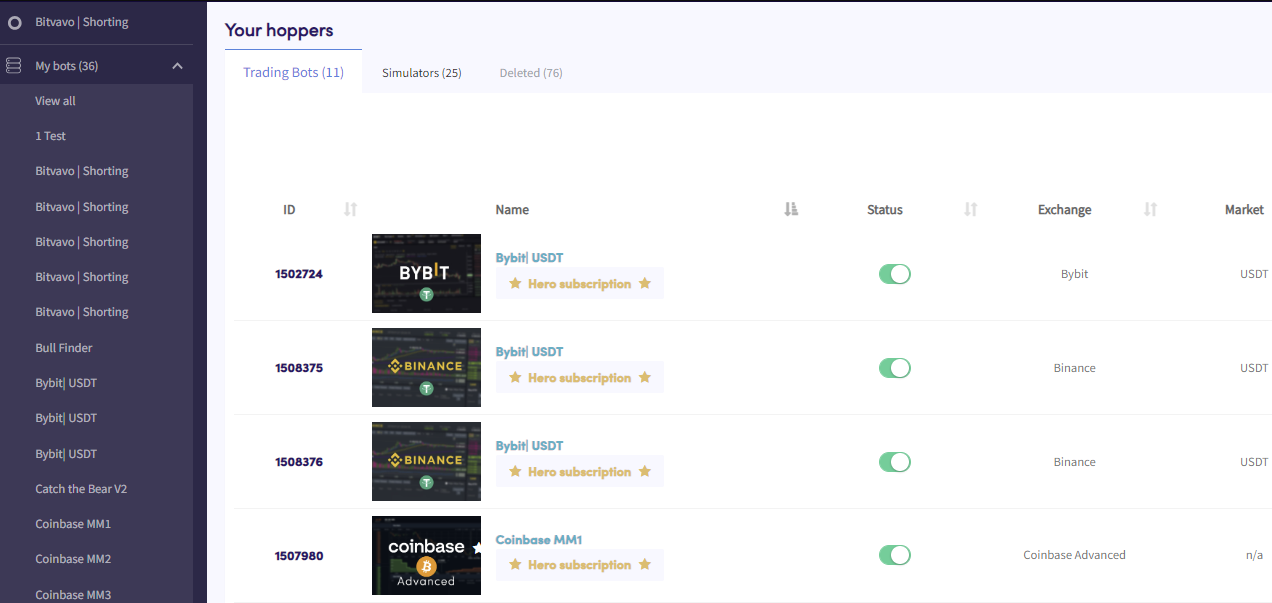
This is where you can create a new bot, edit existing bots, or copy and backtest configurations.
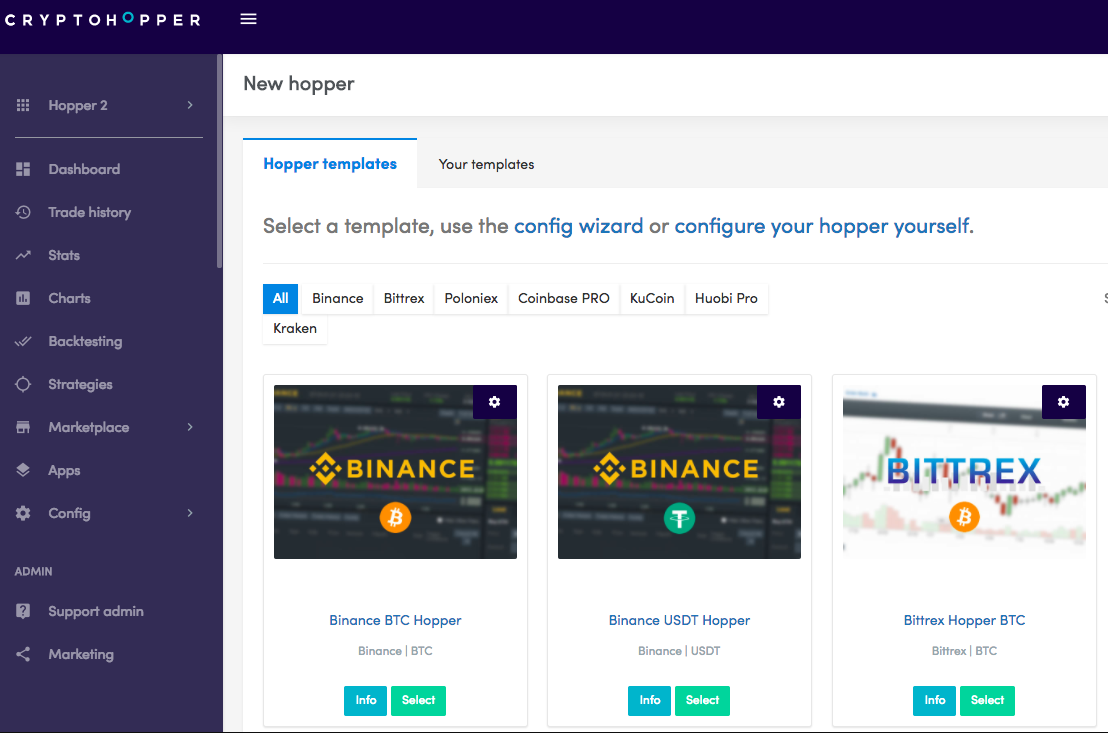
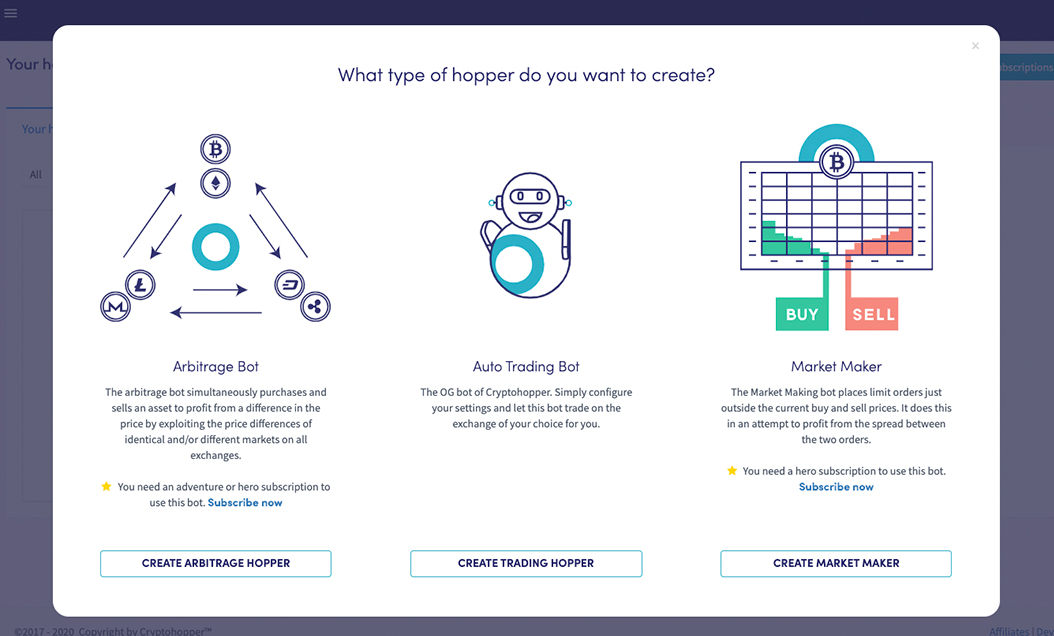
Create a New Trading Bot
Click on the “New Bot” button to start setting up a new hopper. You will first need to give your bot a name – make it something descriptive to identify it.
Next, you can select a template to base your bot on from preset options like “Medium Risk” or “Aggressive Portfolio”. This prefills some starting strategies.
Finally, choose your subscription plan to determine your features access. Hit “Create” to create your new hopper.
Select a Template
Cryptohopper allows you to select a template for your trading bot as a starting strategy. The template populates buy/sell signals, indicators, safety settings, etc.
I recommend selecting “Medium Risk” or “Beginner Portfolio” when first starting out. The templates can be further customized later.
Connect API Keys
To trade live, you’ll need to add your API keys from connected exchanges like Binance, Coinbase, Kucoin etc. Navigate to the “Exchange Setup” tab inside your hopper.
Click “Connect Exchange” next to the ones you want to use. Follow the steps to generate and copy the API keys from your exchange accounts.
The API keys allow Cryptohopper to execute trades on your connected exchanges.
Enable Paper Trading (Optional)
If you want to simulate live trading, you can enable paper trading mode on your hopper. This will use demo balances instead of real funds for testing.
Under the “Bot Detail” tab, toggle the switch for “Paper Trade” to enable it. Once you’re ready to trade for real, turn paper trading off.
Enable the Bot & Save
Once all settings are configured, make sure to toggle your hopper on to “Active” using the switch on the top right. This will start your bot.
Don’t forget to click “Save” anytime you change a setting to ensure it is updated. Your Cryptohopper bot is now ready!
General Configuration
Before you dive into detailed strategy settings, here are some general configuration steps I recommend for your Cryptohopper bot:
Enter Personal Info
Under “User Settings”, enter your full name and country of residence. This is required for legal compliance reasons.
Connect Multiple Exchanges
You can connect as many exchanges as your plan allows to trade across several markets simultaneously. Try linking at least 2-5 exchanges to start with.
Use Simulated Balances
Especially when testing new strategies, I suggest enabling “Simulation Trading” under Bot Detail to use simulated balances. Once confident, you can trade with real funds.
Configuring Your Hopper Settings
Now for the fun part – setting up your bot’s trading strategy and logic. This is where you can customize how and when your bot buys, sells and manages your trades.
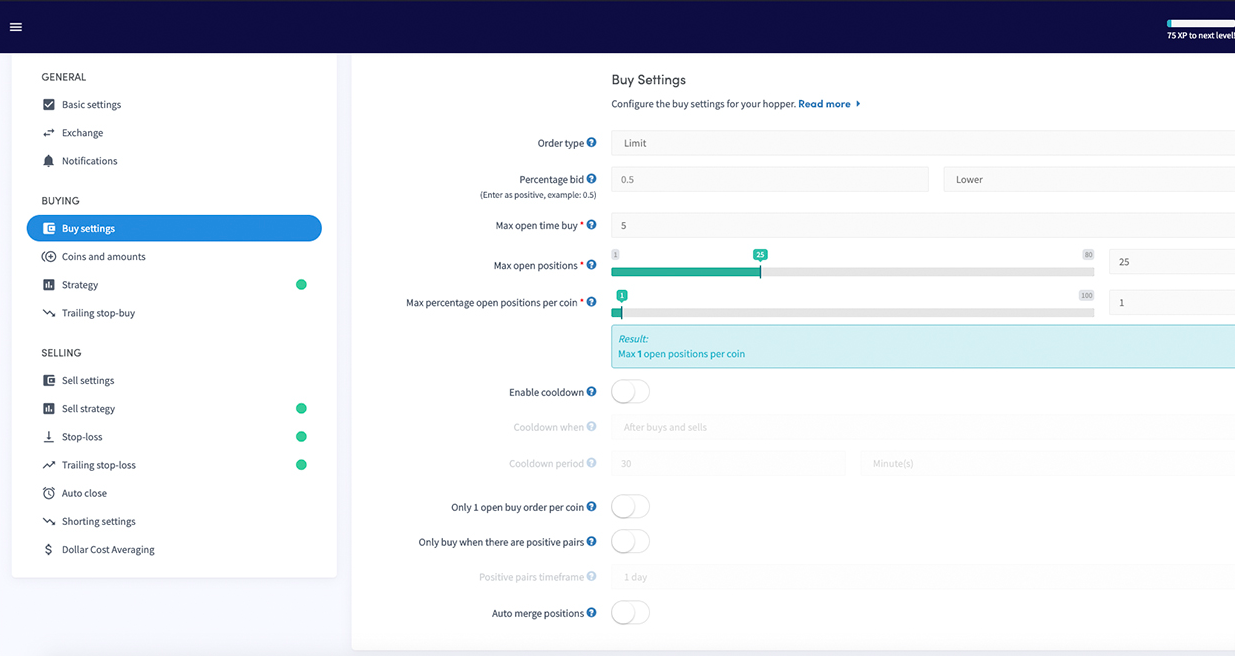
Set Up Buy Conditions
Navigate to the “Buy Conditions” tab inside your hopper. Here you can configure the rules for entering new long positions.
Set your base trading pair (like BTC/USD) and the amounts or percentages to allocate per buy.
Enable dollar cost averaging (DCA) if you want scheduled buys at regular intervals.
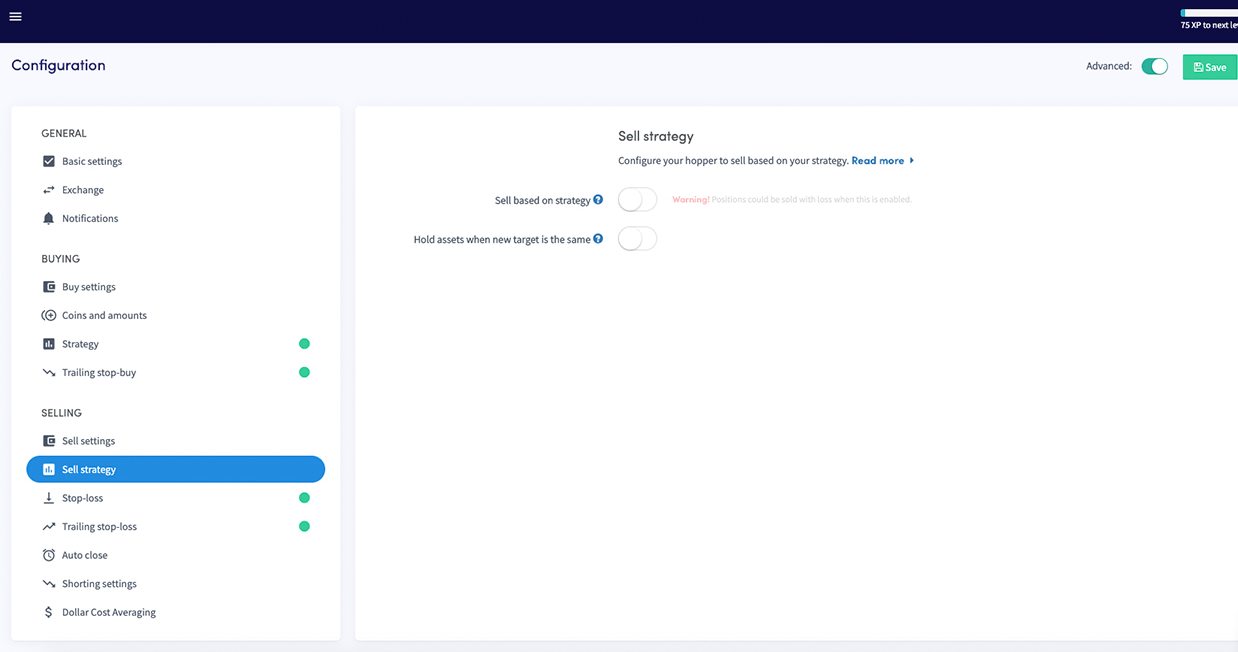
Configure Sell Conditions
Next, define your sell conditions under the “Close Positions” tab. Choose profit targets, stop losses, trailing stops and more so your bot handles exits for you.
Use partial closes at certain profit levels if you want to scale out of positions systematically.
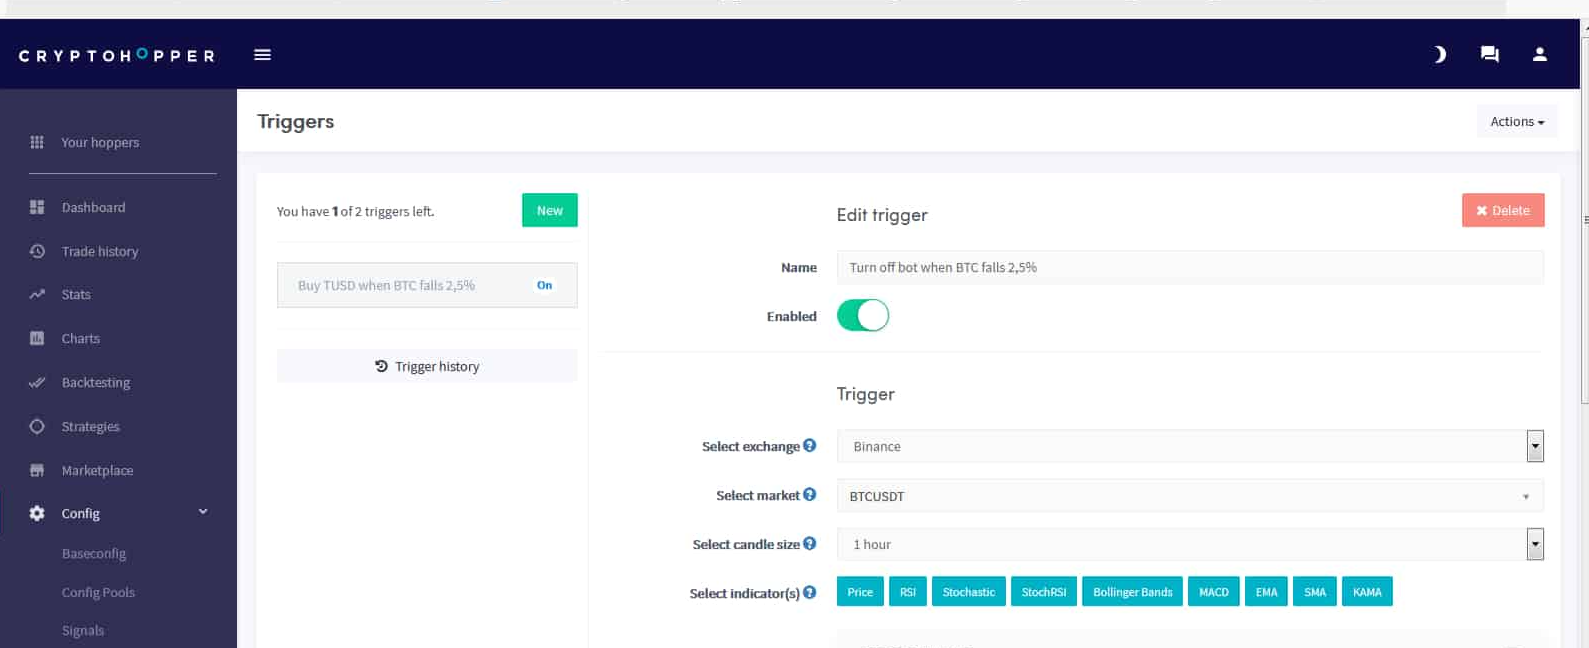
Add Triggers and Signals
You can make your trading more dynamic by incorporating triggers and technical indicator signals.
For example, you can set a “Relative Strength Index” (RSI) trigger so your bot only buys when the RSI value drops below 30.
Multiple conditions and signals can be stacked and combined using AND/OR operators for precise logic.
General Bot Settings
A few other important settings to configure for overall bot management include:
Basic Configuration
The base config defines exchange timeouts, candle periods, trading limits and other general parameters for your hopper.
Market Safeguards
Use features like blacklists, whitelists, trading pauses, maximum open positions and more to control risk.
Notifications
Set up notifications via email or Telegram to receive alerts for triggered buys/sells, errors, etc. so you can stay on top of your bot.
Advanced Configuration Options
Cryptohopper gives experienced traders more advanced functionality including:
Automated DCA
Dollar cost average into positions automatically on regular intervals and coin price drops.
Market Making
Provide liquidity using market making strategies. Set spreads, percentages and more.
External Signals
Incorporate signals from external providers via Telegram or bots for enhanced trading.
Short Selling
Short coins using exchanges that offer margin trading like Kucoin to profit from bearish moves.
Selecting Coins & Exchanges
With your core trading strategy defined, you can select which coins and exchanges your bot should trade.
Add Coins to Trade
Browse Cryptohopper’s curated lists of top coins or find hidden gems to add to your hopper’s portfolio.
Use Market Analysis
View technical analysis data like candle charts, indicators, signals and more to visually inspect coins before adding them.
Pick Supported Exchanges
Verify that your selected coins are available to trade on your connected exchanges. Each exchange’s markets and fees will differ.
Testing & Optimizing Your Cryptohopper Bot
Once built, it’s important to rigorously test your Cryptohopper bot before trusting it with real money.
Backtest the Strategy
Use Cryptohopper’s backtesting feature to run your bot against historical data and note performance. Tweak settings to improve results.
Start with Paper Trading
Turn on paper trading mode and simulate live market conditions using fake money for practice. Ensure it works as expected.
Run Partial Allocations
When going live, run your bot on partial allocations (10-25% of capital) initially. Monitor and scale up positions slowly.
Review Metrics
Utilize the performance stats dashboard to track profitability, risk metrics, fees and more. Identify areas for optimization.
Stay Up-to-Date
As market conditions change, be sure to keep your bot updated by adjusting strategies, signals, safety precautions etc. to adapt.
Troubleshooting Common Cryptohopper Issues
Here are some common troubleshooting steps:
- API keys not valid – Double check your API keys are entered correctly and have trading/withdrawal enabled. Regenerate if needed.
- Bot not buying/selling – Ensure your buy/sell conditions are configured properly and notifications are on. Adjust strategy.
- Wrong positions opening – Check exchange connections, candle periods, signals logic. Use paper trading.
- Bot trading erratically – Turn off bot, check settings, notifications and risk management parameters before restarting.
- No data shown – If metrics or pricing data is missing, try re-linking your exchange APIs and hopper.
- Errors occurring – Bots may face downtime during exchange maintenance. Check status pages and wait for resolution.
Best Practices for Running Cryptohopper
Based on my experience, here are some best practices I recommend following:
- Start with tried-and-tested strategies from their templates before getting creative.
- Be patient and run backtests until your strategy is consistently profitable.
- Add 2FA authentication and use a separate email for exchange APIs for security.
- Monitor your bot through early live trading and tweak settings as required.
- Use simulation mode when testing big configuration changes or new exchanges.
- Diversify across 10-15 uncorrelated trading pairs from different exchanges.
- Dollar cost average into coins over longer periods to reduce risk from volatility.
Frequently Asked Questions
What is the best Cryptohopper template for beginners?
The “Medium Risk” template is a good starting point for beginners. It uses basic indicators and solid risk management parameters.
Does Cryptohopper work on mobile apps?
Yes, Cryptohopper has iOS and Android apps that allow you to monitor and manage your trading bots on the go.
What is the minimum capital needed to use Cryptohopper?
There is no official minimum, but I recommend starting with at least $500-1000 to properly diversify and take advantage of the platform.
How often do I need to monitor my trading bot?
Thanks to the notifications and monitoring tools, you only need to check your bot occasionally to ensure it is running smoothly.
Can I run multiple trading bots on Cryptohopper?
Yes, you can create and run as many uniquely configured bots as your subscription plan allows.
Conclusion
I hope this complete guide covers everything you need to know to set up your own Cryptohopper trading bot from start to finish. Automated trading can be extremely powerful if configured and monitored properly. Take your time backtesting strategies and learning the platform before risking capital. And as always, only invest what you can afford to lose. Happy hopping!

Soraya Marlar is a 43-year-old cryptocurrency trader and analyst. She got her start in the financial world as a stockbroker in the late 1990s, and has been involved in the crypto market since early 2017. Soraya is highly respected within the crypto community for her trading skills and market analysis.